How to safely and correctly remove the cuticle during nail prep
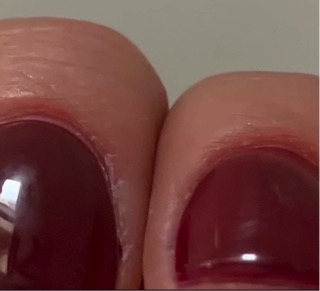
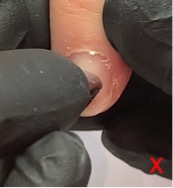
The cuticle can be unsightly and if not removed from the nail plate correctly, can lead to issues such as unhappy customers or service breakdown such as lifting.
To correctly and safely work on this area, the first step is understanding the difference between the cuticle, the proximal nail fold and the eponychium. There is a lot of controversy and misconception in the nail industry and even amongst clients on what should and should not be removed. The fear around cutting the cuticle being dangerous is based on the misconception about what the cuticle actually is.
The cuticle is the transparent/white ‘flakey’ tissue that develops as a film over the nail plate. This dead tissue can safely be removed. What many people refer to as the cuticle is actually the eponychium. This living tissue forms a seal between the nail plate and the skin. On the nail, it’s the visible rim between the skin of the finger and the nail plate itself.
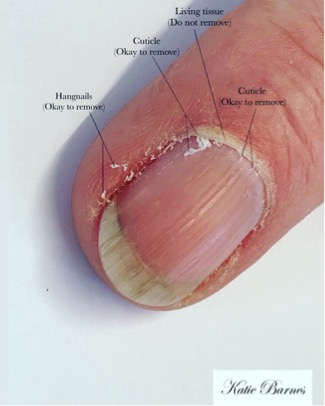
Expert dermatologist states that: "Everything that is yellow, pink and green (and the bone!) in the diagram is “living”, including the eponychium, the nail fold, the nail bed, and the matrix. The cuticle (as per diagram), and nail plate are “dead”, ie made of keratin, and are safe for you to remove".
As nail techs, we aren't qualified to cut or remove living tissue. Over time, cutting the eponychium can make it grow thicker and faster as a defence method and can lead to thickened scar-like tissue. Regular use of cuticle oil, cuticle removers and leaving the eponychium alone will help improve the appearance. The eponychium will be more apparent on damaged nails, over-cut eponychium and nail biters, which is what can be so tempting to customers and nail techs to remove to make the nail appear more aesthetically appealing.
The tools you use play a large part in the success of safe cuticle work. Many fear a sharp tool, yet it is much more effective than a blunt one. Imagine trying to cut food with a blunt kitchen knife – you end up needing more force and end up tearing the food, rather than gently gliding through it. The same goes for cuticle tools: use sharp, good quality items and they will glide, not tear and rip. This is certainly not a result we want when working on the nails. Making sure your cuticle tools are kept sharp will help prevent this issue.
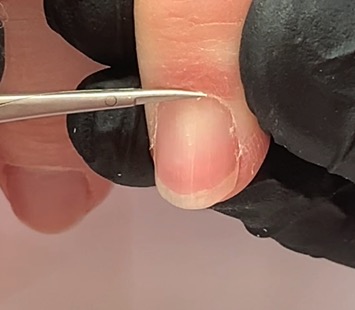
Four steps to perfecting your cuticle work
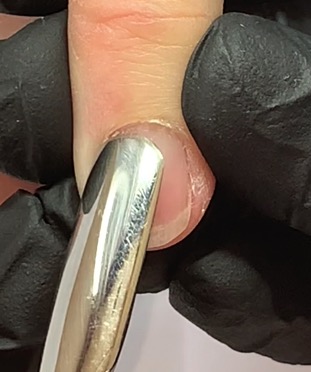
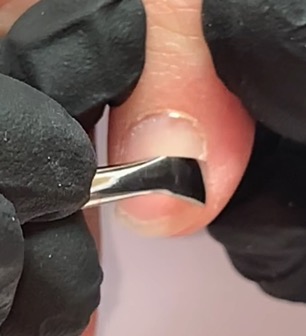
Step 1: Starting 3/4 of the way down the nail plate, push back the cuticle growth from the nail plate using a cuticle pusher such as KB Double-Ended Cuticle Tool or KB Mini Pushie. Work up and down from side-to-side or from centre-to-side, centre-to-side. I recommend a curved edged pusher to mirror the shape of the cuticle zone and avoid sharp edges catching the skin. Work in a 45-degree angle pushing motion. If you hold the tool flat, it will be ineffective; hold the tool at a right angle and the tool will scratch the nail plate.
Step 2: Use the cuticle knife side of the cuticle pusher tool to remove excess stubborn cuticle, especially around the sidewalls. Use the same angles as in step 1.
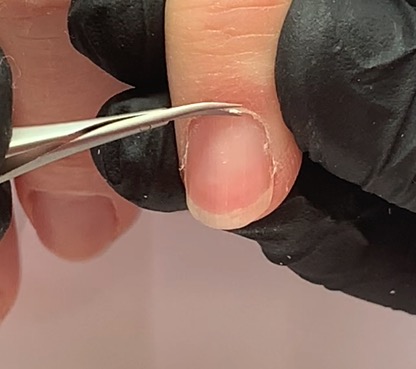
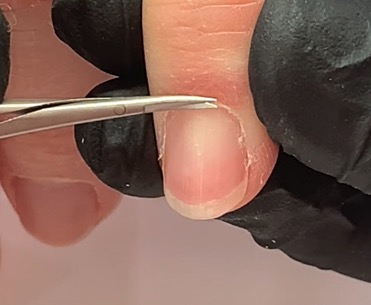
Step 3: Remove any remaining cuticle or hangnails using KB Curved Cuticle Scissors or nippers. The small white pieces of remaining cuticle will be easy to distinguish from the undisturbed eponychium.
Take your scissors and lay them against the fold of the skin, including any cuticle you wish to remove, then turn the blade to face upwards. This ensures the cut is made with the sharpest point of the blade facing away from the skin. Don’t pull at the cuticle with your tools – this may pull at the eponychium, causing hangnails or irritation. Using a sharp, high quality tool will make it easier to remove.
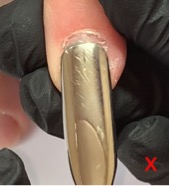
Step 4: The final important step is buffing the nail plate with a sponge like nail buffer. Use this like a cuticle pusher and it will remove any remaining cuticle left on the nail plate. If redness, irritation, discomfort or bleeding occurs then you have removed living tissue. This may not appear until the following day. Always err on the side of caution when working on this area.